
Connections
A connection tells QueryLane how to reach one database server or file. Connections are listed in Connections > Data sources. For a walkthrough, see Connect a database.
Supported engines
Create connection groups the engines by family:
| Group | Engines |
|---|---|
| Files and import | Local files (CSV, JSON, JSONL) and Import |
| Embedded databases | SQLite |
| MySQL-compatible | MySQL, MariaDB, Percona Server |
| PostgreSQL-compatible | PostgreSQL, CockroachDB, YugabyteDB |
| Document databases | MongoDB |
| Analytics databases | ClickHouse |
MariaDB and Percona Server use the MySQL driver, CockroachDB and YugabyteDB use the PostgreSQL driver. QueryLane adjusts to each server's differences, so choose the exact engine. The port defaults to the engine's standard one, such as 26257 for CockroachDB or 8443 for ClickHouse.
Add a connection
- Click Connections in the left rail.
- In Data sources, click + (Add source).
- Choose the engine, or find it with Search.
- Enter a unique Connection name.
- Fill in the Basic tab.
- Click Test. Connection works means the server accepted the settings.
- Click Create.
Basic settings
For the MySQL, PostgreSQL and ClickHouse families, Host, Port, Database and User are required and Password is optional.
For MongoDB, User and Password are optional, and Auth Source names the database that holds the user, for example admin. The Advanced tab adds Auth mechanism, Server selection timeout, ms and Direct connection. See MongoDB.
SQLite asks for a Database file with an absolute path. Choose file opens an existing database, New file creates one. Read only opens the file without allowing changes.
For Local files, see CSV and JSON files.
Several databases in one connection
The Database field sets where QueryLane connects first. The object tree then lists every database your user can reach on the server, with schemas for PostgreSQL, so you do not need a connection per database. See Explorer.
Encrypt with SSL/TLS
The SSL/TLS and SSH tabs appear for the MySQL, PostgreSQL, MongoDB and ClickHouse families.
- Open SSL/TLS and turn on Use SSL/TLS.
- Choose a Verification mode: Require encryption, Verify CA or Verify CA and hostname.
- If the server needs them, enter the paths to CA certificate, Client certificate and Client key.
Allow certificates from any server and Allow invalid hostnames turn off certificate checks.
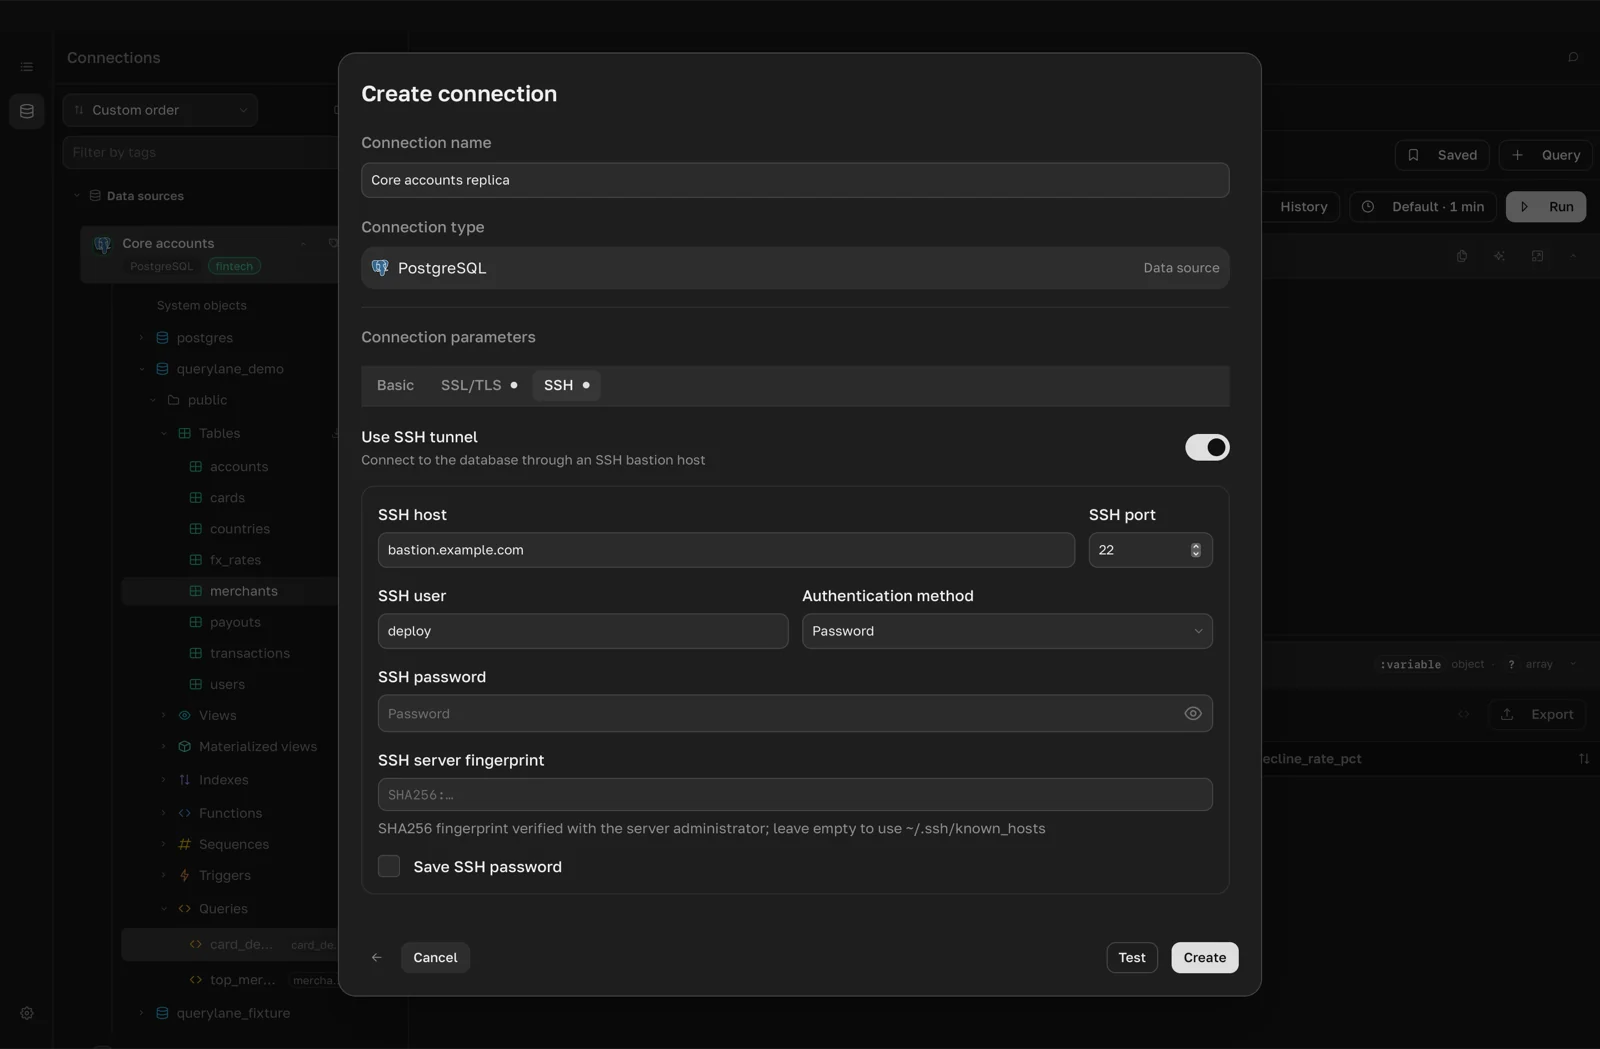
Connect through an SSH tunnel
- Open SSH and turn on Use SSH tunnel.
- Enter SSH host, SSH port (
22by default) and SSH user. - Choose an Authentication method:
- Password: enter the SSH password.
- Private key: enter the key file, for example
~/.ssh/id_rsa, and its Private key passphrase if it has one. - SSH agent: QueryLane uses the keys loaded in your running SSH agent.
- Optionally paste the SSH server fingerprint (
SHA256:…). Without it, QueryLane checks the server against~/.ssh/known_hosts.
On the Basic tab, Host is the database address as the SSH server sees it, for example localhost when the database runs on the bastion itself.
Save SSH password and Save private key passphrase are off by default, so these secrets are not written to disk.
Change, close or delete a connection
Right-click a connection under Data sources:
- Connection settings: change the settings, click Test connection, then Save.
- Close connection: disconnect.
- Delete: remove the connection after you confirm. It appears only when the connection is closed.
To group connections, use Sort by, New folder, New tag and Filter by tags above the list, and Folder and tags in the connection menu.
Import connections
- Click + (Add source) and choose Import under Files and import.
- Select a QueryLane backup (
.enc) or a Navicat connections export (.ncx). - For a QueryLane backup, enter the Decryption key and click Decrypt. For a Navicat file, tick the connections you want. Navicat PostgreSQL, MySQL, MariaDB, MongoDB and SQLite connections are imported, with passwords when QueryLane can decrypt them.
- Under Import mode, choose Add to existing or Replace connections.
- Click Import.
To export connections, use Settings > Backups.