
Run a query
This guide uses the PostgreSQL connection from Connect a database. The steps are similar for MySQL, ClickHouse and SQLite.
Open a table
- Click Connections in the left rail and expand your connection, a database, a schema and Tables.
- Double-click a table. QueryLane opens its data in a new tab.
You can also right-click the table and choose Open data. The data tab shows the rows in a grid. Its toolbar has Refresh and Export, and Row and Import when the connection allows editing.
Write and run a query
Right-click the table and choose New query. A query tab opens with a starter query:
sqlSELECT * FROM public.customers LIMIT 20To start from a generic template (
SELECT * FROM table_name LIMIT 20), use New query on a database or schema, or the + button next to the Queries group.Edit the query in the Code panel. The editor completes table and column names from the connection schema. Format code tidies the SQL.
Click Run. While the query runs, the button changes to Cancel.
The result appears under the editor with the heading Execution result, the row count, when it ran and how long it took. If the query fails, the error appears in its place.
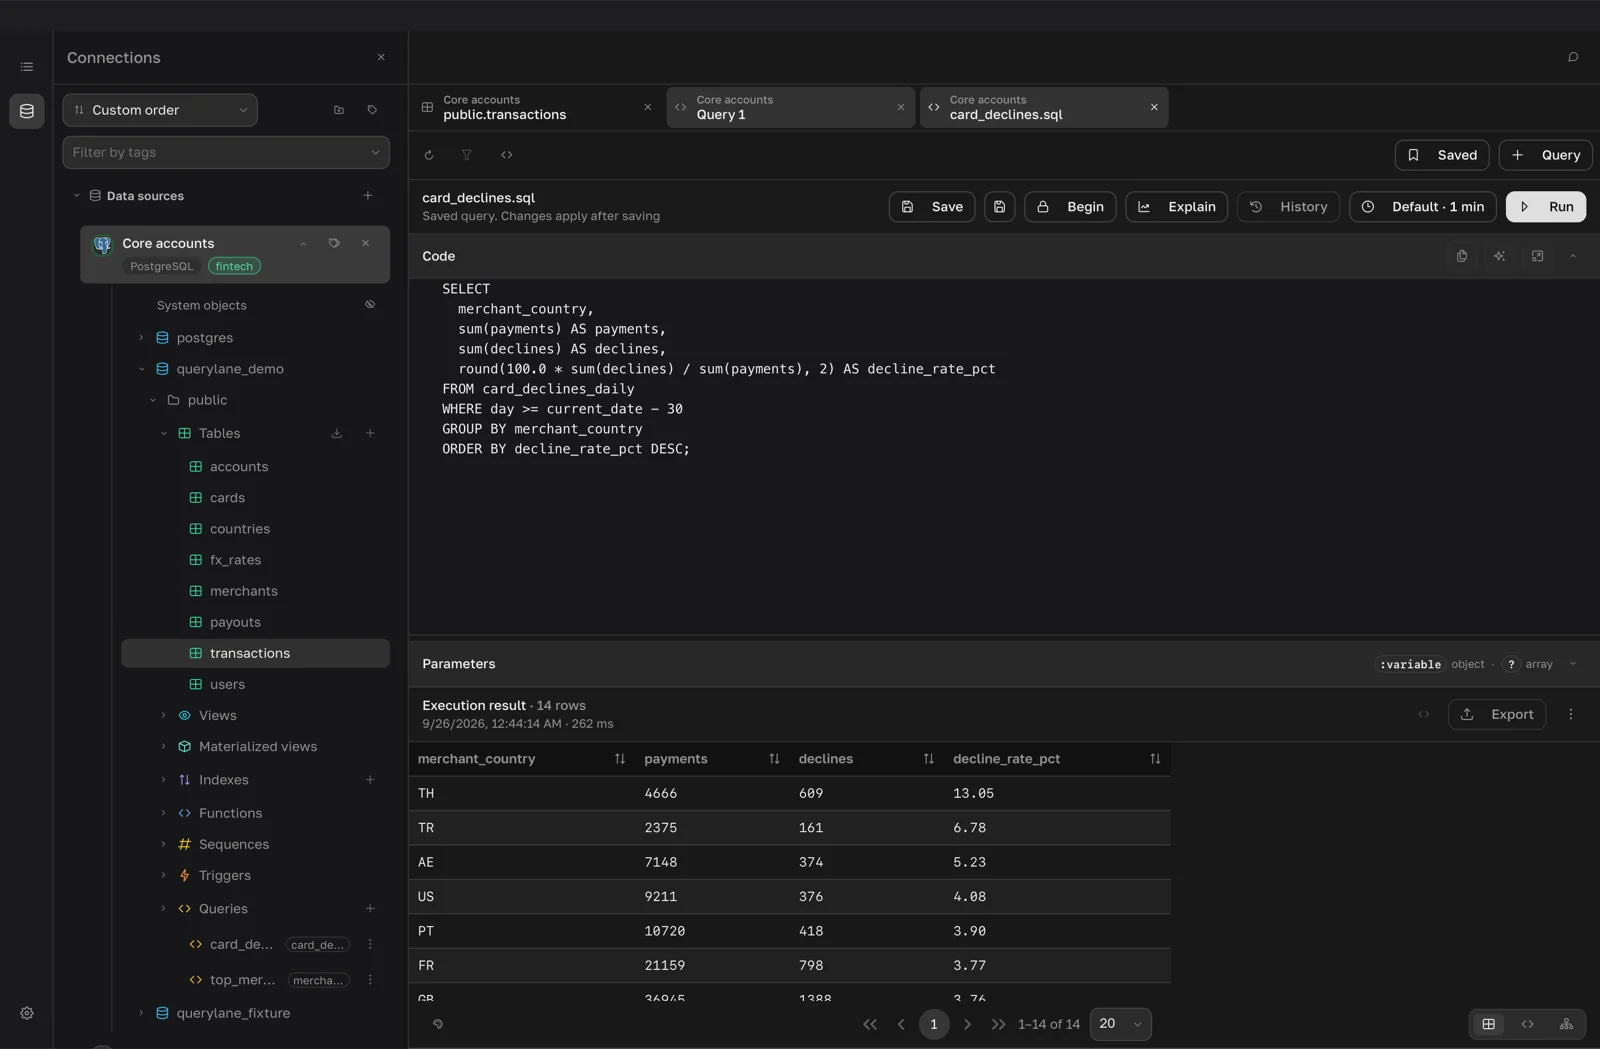
To keep the query, click Save and enter a Name. Saved queries appear in the Queries group of the connection. History lists earlier runs of this query.
Switch the result view
Every result can be shown three ways. Use the Table, JSON and Tree toggle above the result:
- Table: a grid with one row per record.
- JSON: the rows as a JSON array.
- Tree: nested values you can expand and collapse, useful for JSON columns and MongoDB documents.
Switching the view never runs the query again. QueryLane renders the result it already has. If the grid skipped some large values when it loaded the page, QueryLane fetches them for the current page from that stored result.
Each tab remembers its own view. To choose the view new results open in, go to Settings > Appearance > Default view.
Export the result
- Click Export above the result.
- In Export result, pick a File format: CSV, JSON, JSONL or Excel (
.xlsx). - Under Rows to export, choose All rows to export the complete result or Current page for the rows on screen. In a table's data tab, Selected rows appears when you have selected rows.
- Click Export, then choose where to save the file.
When the export finishes, a notification shows the row count and the file path. Use Open to open the file or its folder, or Copy path.
For imports, copying data between connections and more export options, see Import and export. For editing rows in the grid, see Results and editing.
Next: Build a job.