
Schedules
A schedule runs a saved job at set times. Scheduled runs work while the Mac is on, also when QueryLane is closed.
Create a schedule
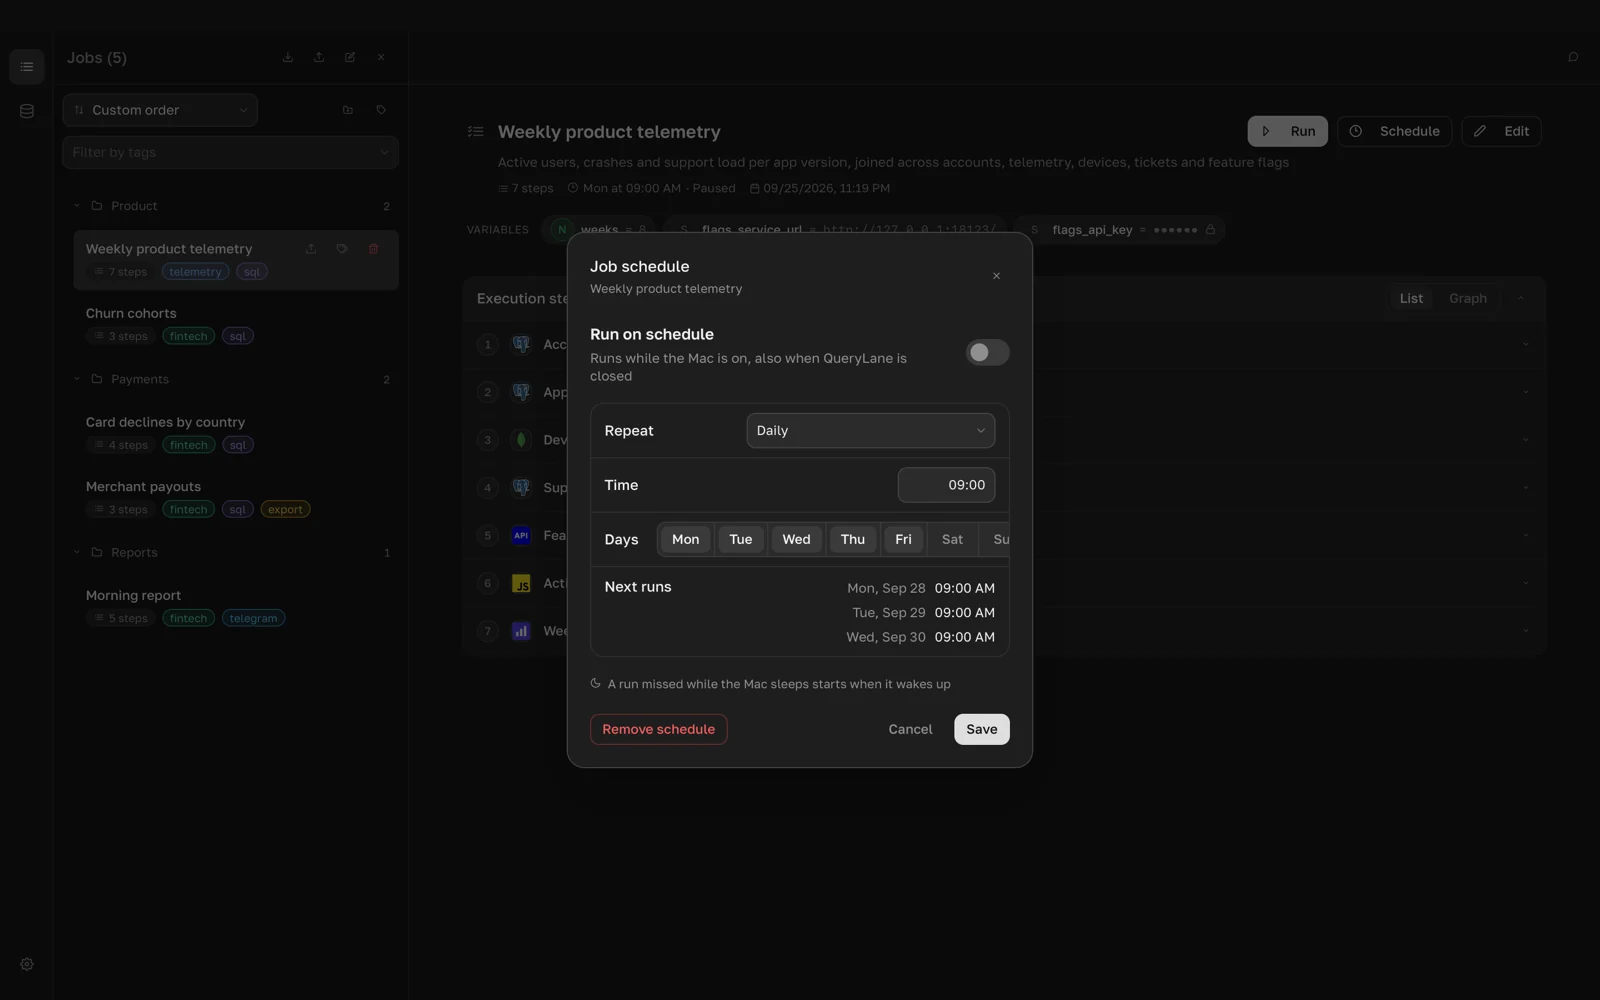
- Open the job and click Schedule.
- Turn on Run on schedule.
- In Repeat, choose how often the job runs:
- Every few minutes: every 5, 10, 15, 20 or 30 minutes.
- Every few hours: every 1, 2, 3, 4, 6, 8 or 12 hours, at the Minute you choose.
- Daily: at a Time on the Days you pick.
- Monthly: on a Day of month at a Time.
- Cron expression: any five-field cron Expression (minute, hour, day of month, month, weekday), such as
0 9 * * 1-5.@hourly,@daily,@weeklyand@monthlyalso work.
- Check the times under Next runs.
- Click Save.
Times use the Mac's local time zone. The job page then shows the schedule and the next run time.
To stop scheduled runs for a while, turn off Run on schedule and save. To delete the schedule, click Remove schedule.
A scheduled run uses the saved job, not unsaved changes in the editor. When you import a job, its schedule comes along turned off.
How schedules run
When you save the first schedule, QueryLane registers a background item with macOS through SMAppService: a launchd agent stored inside the app. launchd starts the agent every minute. The agent checks whether a job is due and exits at once when none is. When a job is due, it starts the run without opening the QueryLane window.
A few rules:
- If the Mac was asleep at the scheduled time, the missed run starts once when it wakes up.
- If the previous run of the job is still going, the new run is skipped.
- QueryLane removes the background item when you delete the last schedule.
Scheduled runs appear in Execution history with a clock icon and the Scheduled run tooltip.
Check the background item
macOS lists the agent as QueryLane in System Settings > General > Login Items (Login Items & Extensions on macOS 15 and later). If you switch QueryLane off there, scheduled jobs stop running, and the schedule dialog says QueryLane is off in macOS Login Items.
Open Settings > Schedules to see the state of the macOS background item, for example Running or Off in macOS. Click Open macOS settings to go to the system page and switch it back on. The same page lists Scheduled jobs with their last run.
Notifications
QueryLane sends a macOS notification only when a scheduled run needs your attention:
- Scheduled run failed;
- Scheduled run stopped by a result check;
- Scheduled run finished with check warnings: N.
Successful runs without warnings do not notify. Click a notification to open the job. When you save a schedule, QueryLane asks macOS for permission to send notifications if it does not have it yet. Turn them off with Scheduled runs in Settings > Notifications. See Result checks for how checks stop a run or add warnings.
Reports on success
To get a message after every run, including successful ones, use a notification plugin such as Telegram. When such a plugin is installed, the job editor has a Notifications section. Turn on Notify for the plugin, and the plugin receives the result of each full run of the job, manual or scheduled. The plugin settings decide which runs it reports and what the message contains.